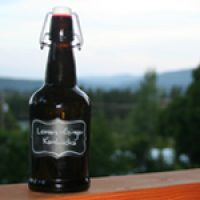
Homemade Kombucha
Homemade kombucha is as simple as brewing some tea and adding a bit of sugar. Follow this recipe and you'll be enjoying this delicious drink for just pennies a serving.
Print
Pin
Servings: 2 gallons kombucha
Calories: 240kcal
Ingredients
- 1 3/4 gallon filtered water
- 2 cups organic sugar
- 12-16 organic black Oolong tea bags
- 4 cups starter tea plain kombucha
- SCOBY
Instructions
- Boil 1 ¾ gallon water (28 cups). Once water is boiling, turn off heat.
- Add 2 cups of sugar. Stir to dissolve.
- Add 12-16 tea bags and let steep for ten minutes, remove bags and let cool until room temperature (I use 12 tea bags as I prefer a mild kombucha).
- Once your tea is room temperature, pour into your glass vessel (we love this 2-gallon dispenser to have kombucha “on tap” at all times). It’s important to note that your vessel have no metal parts as this can be damaging to your SCOBY.
- Add 4 cups of starter tea to your glass vessel.
- Carefully place your SCOBY on top of your tea. (It should want to float, although sometimes my SCOBY is lazy and floats sideways in my jar. Whatever your SCOBY wants to do is fine, be accommodating and gracious, he’s going to provide you with delicious nectar in about a week or two!)
- Cover your vessel with a coffee filter, paper towel or tea towel and a rubber band.
- This is perhaps the most difficult step…WAIT! How long? I’m not sure!
- SCOBY’s love temperatures between 68-85℉, but can survive above or below that. The colder it is, the slower the SCOBY will ferment your tea (they just aren’t as hungry when they’re cold). The warmer it is, the quicker the ferment.
- The best part is getting to taste-test your kombucha. Once your baby SCOBY has formed, you can start tasting your brew. If you’re not using a dispenser jar, then carefully dip a non-metallic spoon into your jar, and give it a taste (the goal is to taste your kombucha while keeping the SCOBY floating on top). If it’s still pretty sweet, then let it keep going. This is completely preferential though! Your taste buds will tell you when it’s ready!
- When your kombucha is to your liking, drink away! If you leave it at room temperature it will continue to ferment and get a stronger flavor. Or, you can remove the SCOBY and a bit of starter tea (and start your next batch of kombucha) and place it in the refrigerator to enjoy!
- The longer you allow your kombucha to ferment, the less sugar content and caffeine it will have, so this is a good reminder if you’re letting your kids drink it (or wanting to drink it in the evening).
Notes
- It’s best if you can get a SCOBY from a friend, however, I had success using this starter culture.
- I successfully started my very first batch of kombucha from a bottle of store-bought plain kombucha (GT brand). However, if you read reviews about using store bought kombucha, you’ll find varying opinions/results following this method. So I leave you to use your own discretion.
- When choosing your kombucha vessel, be sure there are no metal parts as this can damage the SCOBY.
- Natural sweeteners like honey or maple syrup are not favorable for making kombucha as the SCOBY tends not to thrive on these sweeteners (and raw honey contains natural microbes that can interfere with the SCOBY).
- Don’t worry about the large amounts of sugar added, most is consumed by the SCOBY during the fermentation process.
- When covering your kombucha, be sure it's fine enough to keep all bugs out. Fruit flies love kombucha and finding tiny fly larvae on your SCOBY is not a pleasant experience (true story!).
Nutrition
Serving: 8oz | Calories: 240kcal | Carbohydrates: 56.3g | Sodium: 80mg | Sugar: 16.3g