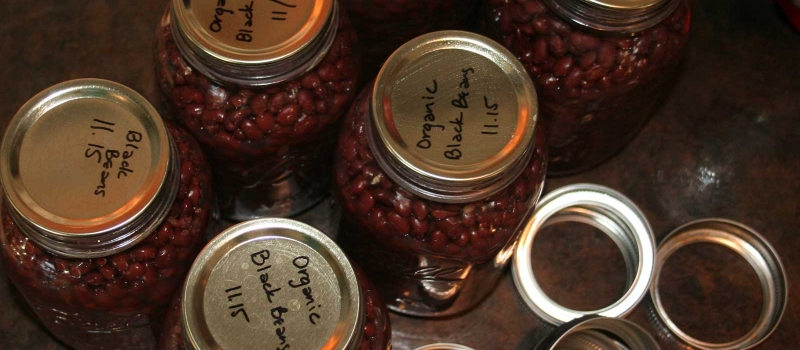
s I’ve mentioned before, beans have only recently become a staple in our household. Our “bean-of-choice” is the black bean. It’s so versatile…great in chili and taco bowls, soups and salads, and also makes killer re-fried beans.
With the cost of food rising and the quality of pre-packaged foods declining, it was time for a swap-out in our cupboards. Canned beans from the grocery store were getting the boot for the humble dry-beans, pressure canned at home.
If you missed our post on why you should can your own beans, including the cost savings and nutritional benefits, then you’ll want to check it out…but since you’re already here, I presume you don’t need more convincing. So let’s get on with it…
Ingredients
5lbs organic black beans
Filtered water (slightly warm is preferred)
½ cup whey or lemon juice
16 cloves garlic, peeled and mashed (optional)
Sea Salt and pepper
Pint or Quart canning jars and lids
Pressure canner (this is the one I have…thanks mom!)
Buy from Amazon
Black Beans
Salt
Pepper
Pint canning jars
Quart canning jars
Pressure cooker/canner
Buy from Azure
Black Beans
Lemon Juice
Garlic
Salt
Pepper
Pint canning jars
Quart canning jars
To Make: (This recipe makes approximately 8 quarts or 16 pints)
In a large, 3 gallon stock pot (or the equivalent in multiple pots), cover beans with approximately 2 gallons of warm water and stir in whey or lemon juice. Leave in a warm place for 12-24 hours.
Drain beans, thoroughly rinse and return to the pot, adding enough fresh water to cover beans by a few inches. Bring to a boil and cook for 30 minutes, skimming off any foam that rises to the top.
Meanwhile, prepare your clean jars for canning by submerging them in a sink of hot water (this also warms them up, minimizing their chance of cracking). Bring a large pot of water to a boil and reserve for later. Bring a small saucepan of water to a boil and place your lids in the water, turn off heat and cover, keeping them warm until needed.
Next, grab a large ladle or serving spoon and a wide mouth funnel, as well as a clean, damp towel.
Once beans have finished cooking, drain and rinse them again. Drop 1-2 cloves garlic and ½-1 tsp salt into each jar. Pack beans into jars, leaving just over 1 inch head space. Pour reserved hot water over beans, leaving 1 inch head space. Wipe rims clean with a damp towel and position lids on jars, securing them “fingertip tight” with bands.
Follow the manufacturer’s instructions for your particular pressure canner. I canned mine at 11lbs. of pressure for 90 minutes. I used quart jars and am also at high altitude so I adjusted accordingly for that.
Congratulations! Your family now has a bounty of canned beans and a few extra bucks in your pocket! For a quick and easy lunch, mash up a can of beans in a pan with coconut oil and taco seasoning, cook up a pot of rice (adding some coconut oil for healthy fat) and you have delicious rice and beans!


Got a pressure cooker and going to try this out today!
AWESOME! I love having homemade, pressure canned beans on hand! Plus, I can mine in quart jars so I only have to open one jar to feed my family of 6!