


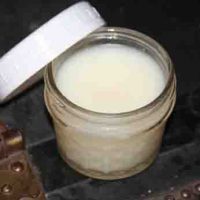
DIY Vapor Chest Rub
A soothing recipe to keep in your natural medicine cabinet.
Having a cold or the flu is for the birds, but we’re all prone to get them, especially as Summer fades into Fall and the constant climate changes take their toll. It’s so important to have natural, non-toxic remedies on hand like this homemade vapor chest rub.
As much as we try to prepare ahead of time by getting adequate prebiotics and probiotics, we’re all bound to get sick at some point. When I’m sick, there are a few creature comforts I want to have: warm, soothing soup; cozy pillows and blankets; and something to take away the congestion, aches and pains.
As a child, my mom would rub Vicks VapoRub on my chest and under my nose, to this day I instinctively smell that menthol scent and I know relief is on its way. That cooling sensation followed by the decongestant goodness makes any cold or flu more tolerable.
These days I’m more aware of the toxic ingredients used in these OTC remedies. Sure they’re likely to bring relief, but at what cost to our toxic load?
Quite frankly, I’m not too thrilled about the idea of adding toxins in order to relieve symptoms. BUT, if I don’t have an alternative, I’m likely to cave and run to the store at the first sign of congestion or discomfort.
Because cold and flu season is upon us, and the first sniffles and coughs are making their way through our house, it’s timely to share our DIY soothing chest rub and a few other remedies we use to help bring relief and allow for rest so our bodies can heal and restore themselves.

DIY Vapor Chest Rub
A soothing recipe to keep in your natural medicine cabinet.
Ingredients
Adult and Children 6+
- 1/2 cup Coconut Oil
- 2 Tbs Beeswax Pearls or 1/2 cup Unrefined Shea Butter
- 20 drops Eucalyptus Oil
- 20 drops Peppermint Oil
- 10 drops Cinnamon or Clove Oil
- 10 drops Lavender Oil
- 10 drops Lemon Oil
- 10 drops Rosemary Oil optional
Babies and Children 5 and Under
- 1/2 cup Coconut Oil
- 2 Tbs Beeswax Pearls or 1/2 cup Unrefined Shea Butter
- 4 drops Fir Oil
- 10 drops Lavender Oil
- 10 drops Lemon Oil
Instructions
- Add a couple inches of water to a shallow pan and bring to a simmer on the stove.
- Add coconut oil and beeswax or shea butter into a glass pint jar and gently place into the boiling water.
- Stir mixture until all ingredients have melted and combined. If you would like to whip your mixture, you can use an immersion blender and whip at this time* (blend carefully as your oil mixture will be hot!).
- Add essential oils and stir to combine.
- Allow to cool to room temperature, stirring occasionally to keep oils from separating. To speed this process up, place jar in the refrigerator and stir frequently.
- Store in an airtight container (preferably glass) and use at the first signs of a cold. We prefer to store ours in the refrigerator for an immediate cooling sensation when applied.
Notes

More Cold and Flu Relief
- Hydrate – It’s extremely important to stay hydrated while sick as our bodies are working overtime to get rid of the virus or bacteria that’s causing us to feel horrible. We don’t often have much of an appetite while sick, but sipping on bone broth when ill can actually help speed up recovery time.
- Rest – Our bodies heal and restore themselves while we sleep, so be sure to get extra sleep while feeling under the weather.
- Diffuse – We like to keep the diffusers running 24-hours a day at the first sign of illness in hopes the germs don’t spread to the whole family. Our favorite to diffuse is this Germ Fighter Blend (or this KidSafe Germ Destroyer), but the combination of oils used in the chest rub are also wonderful to diffuse (as is this Respir-Aid blend for adults, or this KidSafe Sniffle Stopper).
Additional DIY Recipes:


Oooo, this is awesome! My little ones always seem to have some congestion issues during the winter months, so keeping this recipe on hand will be so helpful. Thanks for sharing <3
Congestion is never fun…but having a natural remedy you can trust IS! I hope this works well for you this winter Savannah!
Great recipe! We use this as a lip balm in the summer but with different essential oils. So soothing.
Awesome Nat! I love how versatile this base is! Also makes for a GREAT deep moisturizer for summer feet!
This is great to know! thank you so much for sharing
Of course! Glad to help! 🙂
This looks great! I love DIY like this. I love the oils that you used in the rub too.
Thanks Emily! The oils are so soothing and smell so yummy!
Kelsey where can I get these things for the chest rub locally? Also there is a glitch on the website when it first loads and gives you an option to get emails. It keeps kicking me back out.
Hey Sarah! That’s our “Welcome Mat”…there should be an arrow at the bottom that you can click to make it go away…try that and please let us know if it works! As for getting these products locally, I always buy through Amazon (it’s possible they’re sold locally, I just haven’t looked). And we buy our essential oils through Plant Therapy. We have a link on the side bar to Plant Therapy (we’re affiliates)…you’ll get $10 off your first order and shipping is always free! Check out this post if you’re wanting more info, they’re a great company and we’ve used them for years. Alternatively, if you already have essential oils, you can make this recipe without the shea butter and beeswax and just keep it in the refrigerator. Hope this helps!